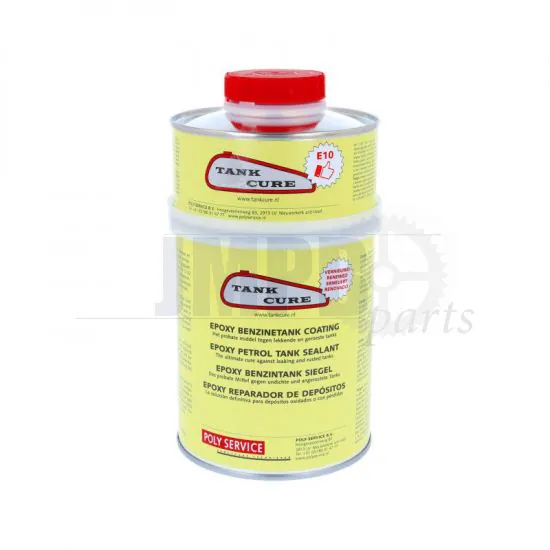
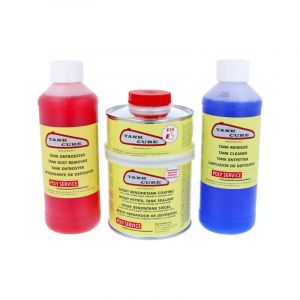
Tank Cure Coating set - 600 Grams
- Tank Cure Coating kit.
- 600 grams, sufficient for a tank from 20 up to 30 liters
- 400 Gram coating + 200 Gram Hardener.
- Solvent free two component epoxy coating with excellent fuel and oil resistance. Can be used on the inside of metal tanks In order to guarantee a good result treat the tank firts with Tank Cure Cleaner and Tank Cure Deruster.
Mix the two components thoroughly with each other and fill the tank with it. Then close the filler opening. Turn the tank slowly in all directions so that the coating can reach all points on the inside. Do this for 15 minutes and then drain the excess fluid through the filler opening. After a minimum of 7 days curing at room temperature, the tank can be used again. - The mixing ratio of base / hardener by weight is 100: 50.
- The pot life at 20 ° C is approximately 15 minutes.
- Minimum application temperature is 20 º C.
- A set of 600 grams is suitable for the treatment of tanks from 20 up to 24 liters.
- Suitable for E10
Tankcure Information
You can find all our Tankcure products here.
What can you achieve with our Tank Sealant?
- Cure rusted tanks
- Stop leakage through seams and pinholes
- Preventive treatment against leaking seams, pinholes and the build up of rust
- Shield off pollution in oil tanks (after sandblasting)
Treatment of the tank before application of Tank Sealant
In order to guarantee a good result you always have to do some preparation on your tank Before you apply the sealant the tank should be absolutely dry, free of grease and almost free of rust. "Tank Cure has products that will assist you in the preparation of the tank.
- Tank Cure Tank Cleaner
- Tank Cure Tank Rust Remover
- Tank Cure Epoxy Remover
These products form an ideal base before you apply our tank sealant. We will briefly highlight each product:
Tank Cure Tankcleaner
This is a strong claening fluid to degrease your tank. We advise to always use this product because it will guarantee a good adhesion of the sealant to the surface of the patrol tank. Especially if you apply the sealant in a tank for a two stroke engine it is nessesary to use the tank cleaner first.
Tank Cure Roest verwijderaar
Tanks with a rusted interior can be treated very succesfully with this product. We advise to use the Rust Remover if the inside of your tank is severely rusted.
Tank Cure Epoxy Remover
This product will remove all old layers of pait and/or sealants. Only use this product if you would like to apply a new sealant or if you plan to weld on your tank. You only need this product if you like to remove old layers of sealant or paint or if welding is needed on a tank that has sealant inside. For a motorcycle tank you will need 1/2 a litre of Tank Cleaner and 1/2 a litre of Rust Remover.
Frequently Asked Questions
When do I treat a tank with sealant?
If it is rusted or has leaking seams or pin holes. After your tank is re-chromed it will rust very quickly. It is advisable to apply a sealant immediately after your tank has been re-chromed
There are several different products on the market. Which one to go for?
Take a product that has been on the market for some years and has built up a good reputation. Don't use only the sales man's word. With Tank Cure we have 18 years experience.
How much sealant do I need?
Make sure you always have sufficient sealant to treat the whole of inside.
As a guide:
Tank up to 20 litres (up to 4.5 gallons): 450 grams
Tank up to 50 / 60 litres (up to 10 / 12 gallons) 600 gram
There might be some slight variation, depending on the brand of sealant used. Don't forget you must treat the whole of the inside of the tank, not just the bad spots.
If I need to weld my tank in the future or wish to change the shape of my tank, what will happen to the sealant?
In general all sealants will melt at temperatures above approx. 150 C. making a welding job impossible. It is advisable to go for a sealant that you can remove. Tank Cure has a special remover for this situation.
Do I go for a single or two component sealant?
A two component product is less sensitive to other problems such as temperature and humidity. Look at the professional world where paint and fillers are all based on two or even more components to guarantee a certain result within a given time span. With a two component sealant the cure time is set off by the chemical reaction between the components. It is questionable if the remains of a single component sealant will cure in a enclosed environment such as a petrol tank especially if you can not drain all of the surplus out of the tank.
Will sealant cure small pin holes?
Most of the available sealants will cure small holes. Tank Cure is a proven solution. Advice: in general it is preferable to weld or solder holes that exceed 2 millimetres. Use sealant after this has been done.
Do I apply the sealant before or after the tank receives new paint on the outside?
The easiest way is to apply the sealant first. There is no risk of damaging the fresh paint when you apply the sealant first. If however, the paint job involves temperatures above 100o C do the paint job first to prevent the sealant from melting. Ask for the sealant specification in this case!
Do I have to treat the tank before I apply a sealant?
Yes, always. A tank needs to be free of any grease before you apply a sealant. So take special attention if you use a two stroke petrol. If your tank is rusted take out as much rust as you can. Most of the suppliers of sealants have certain products that you can use to prepare your tank. As an example: Tank Cure Cleaner and Tank Cure Rust remover.
My tank has small tubes that act as an air vent. Can I still apply a sealant?
Yes. Seal off the air vents during the application of the sealant. When you take out the residue use an air compressor to free the tubes from sealant. Do this before the sealant starts to cure!
How long can I use it after I have mixed the two components?
You can work with it for half an hour. After 45 min. it will start to cure and hardens out quickly.
What is the colour of the Tank Cure sealant?
The sealant is transparent.
What to do if your product fails?
For steel tanks you can use the Tank Cure epoxy remover to take the sealant out. But remember: if you follow the guidelines the product will not fail!
Can I also apply Tank Cure sealant on the outside of the tank?
Yes, you can apply the sealant wherever you like. There is one precaution: the surface has to be dry and free of grease. The best option is to use it on the inside and treat the outside with an epoxy primer or epoxy filler.
I want to treat 2 tanks. Is this an option?
Yes. Use the 600 gram portion for two tanks up to 10 or 12 litres. The 450 gram portion will do two tanks smaller than 10 litres
1) Take an accurate pair of scales (digital) and take half of both components. Mix them for the first tank. Leave the rest for the second tank.
2) Prepare both tanks, clean them and take the rust out. First treat the tank with the smallest internal surface. This tank allows you to get all of the residue out. Turn the first tank for 15 minutes and drain off the residue quickly. Put the residue in the second tank and turn this also for 15 minutes before taking the residue out.
My tank has internal shields. Can I still apply sealant
Yes. Make sure to use sufficient sealant and try to cover the shields first before you do the "easy" surfaces like bottom and top of the tank. Try to imagine where the sealant is on the inside of the tank and take your time turning it in all directions.
My tank is rather dirty and rusted. What should I do?
First clean out the tank with cleaner. Get most of the rust out with the help of a handful of clean gravel. Then use rust remover. You can combine the gravel with the rust remover if you like. Follow the guidelines and apply the sealant.
My tank has a coating on the inside that has come loose. What is the solution?
You might give the Tank Cure epoxy remover a go. There is a good chance that it will help you out. Clean your tank with water let it dry and apply the remover. Wait a couple of days and see what happens. Follow the guidelines supplied with the epoxy remover.
I only used normal petrol in my tank do I still need to clean it?
Yes. Use Tank Cure Tank Cleaner for the best guarantee on the end result. Use white spirit as a minimum treatment.
I have cleaned out my tank with a different brand cleaner. What should I do?
ONever play around with different chemical products without cleaning the tank with water in between. Tank Cure Rust Remover is a diluted acid based product and should not be used in combination with another product.


 NL
NL EN
EN DE
DE BE
BE AT
AT